
When it comes to installing custom railings on your own, accurate measurements are crucial. Precise measurements ensure that the railings fit perfectly, providing both safety and aesthetic appeal. Custom railings tailored to your specific space not only enhance the beauty of your home but also add value and functionality. Whether you’re upgrading your porch, deck, staircase, or balcony, getting the measurements right is the first step towards achieving a professional and polished look.
Custom railings offer a variety of benefits. They allow you to match the railing design to your home’s architectural style, choose materials that best suit your environment, and ensure that the railing fits perfectly into the designated space. This tailored approach ensures that your railings are both beautiful and functional, providing the exact level of safety and support you need.
Tools and Materials Needed
To measure for custom railings accurately, you’ll need a few essential tools. Here’s a list of what you’ll need:
Essential Tools:
- Measuring Tape: A reliable, sturdy measuring tape is a must for taking accurate measurements.
- Level: To ensure your measurements are straight and your railings will be level.
- Notepad and Pencil: For jotting down all your measurements and any important notes.
- Straightedge or Ruler: Useful for drawing straight lines and measuring smaller sections.
Optional Tools for More Precision:
- Laser Measure: Provides quick and highly accurate distance measurements, especially useful for longer spans.
- Digital Level: Offers precise angle measurements and ensures your railings will be perfectly aligned.
Step-by-Step Guide to Measuring for Custom Railings
Step 1: Determine the Type of Railing Needed
The first step in measuring for custom railings is to determine the type of railing you need. This decision will depend on whether the railing is for an indoor or outdoor application, as different materials and styles may be more suitable for each environment.
Indoor vs. Outdoor Railings:
- Indoor Railings: Typically used for staircases, lofts, and interior balconies. These railings often focus on complementing interior design and providing safety.
- Outdoor Railings: Commonly installed on decks, porches, balconies, and patios. Outdoor railings need to withstand various weather conditions and are usually made from durable materials like aluminum, stainless steel, or glass.
Specific Location:
- Staircase: Measure the length, height, and angle of the stairs.
- Balcony: Measure the perimeter where the railing will be installed.
- Deck: Measure the length and width of the deck edges requiring railings.
- Porch: Measure the sides and any steps leading up to the porch.
Step 2: Measure the Total Length
Once you have determined the type of railing, the next step is to measure the total length of the area where the railing will be installed. This is essential for ensuring that the railing sections fit perfectly and cover the entire required space.
How to Measure the Length:
- Use a measuring tape to measure from one end of the area to the other. For straight sections, simply measure the straight distance.
- For curved sections, use a flexible measuring tape to follow the curve accurately. It might help to measure in small segments and then add them together for the total length.
Tips for Measuring Straight vs. Curved Sections:
- Straight Sections: Ensure the tape is taut and straight. Take multiple measurements to verify accuracy.
- Curved Sections: Use a flexible tape measure and take multiple segment measurements along the curve to ensure you capture the entire length accurately.
Step 3: Measure the Height
Accurate height measurements are crucial for both safety and compliance with building codes. The height of the railing can vary depending on its location and purpose.
Standard Railing Heights and Building Code Requirements:
- Residential Staircases: Generally, the handrail height should be between 34 and 38 inches from the nose of the stair treads.
- Decks and Balconies: Railing height is typically 36 inches for residential properties and 42 inches for commercial properties, but always check local building codes.
How to Measure the Height for Safety and Functionality:
- Use a measuring tape or ruler to measure vertically from the base where the railing will be mounted to the desired height.
- For staircases, measure from the tread of each step to ensure consistency and compliance with code requirements.
- Take into account any additional features, such as post caps or handrails, which may affect the overall height.
Step 4: Account for Angles and Slopes
When measuring for custom railings, it’s essential to account for any angles or slopes, particularly for staircases and sloped surfaces.
Measuring Staircases:
- Angle Measurement: Use an angle finder or protractor to measure the angle of the staircase. Place the tool on the staircase treads to get an accurate reading of the incline.
- Rise/Run Calculation: Measure the rise (vertical height) and run (horizontal depth) of each step. This helps determine the overall slope and the angle at which the railing needs to be installed.
How to Measure for Angled or Sloped Surfaces Accurately:
- For angled railings, measure the length of each segment along the angle, ensuring you capture the true distance the railing will cover.
- For sloped surfaces, measure both the horizontal and vertical components, then use these measurements to calculate the total length of the railing needed to cover the slope accurately.
Step 5: Measure Spacing Between Posts
Proper spacing between posts is crucial for the structural integrity and aesthetic appeal of your railings. It ensures that the railings are strong enough to support weight and comply with safety standards.
Importance of Post Spacing:
- Correct post spacing provides necessary support to the railing, preventing sagging or instability.
- Proper spacing enhances the overall appearance and uniformity of the railing system.
How to Determine the Number of Posts Needed and Their Spacing:
- Measure the total length of the railing section.
- Divide this length by the desired spacing between posts, typically 4 to 6 feet apart, depending on the material and design. This will give you the number of posts required.
- Mark the positions for each post along the length of the area to ensure even spacing and proper alignment.
Step 6: Note Any Obstacles or Special Features
While measuring, it’s important to identify and account for any obstacles or special features that may affect the installation of the railings.
Identifying and Measuring Around Obstacles:
- Look for columns, walls, or other fixed structures that may interfere with the placement of the railings.
- Measure the distance to and around these obstacles, ensuring you have enough clearance for the railing to be installed properly.
How to Measure for Special Features Like Gates or Doors:
- If your railing design includes gates or doors, measure the width and height of the openings where these features will be installed.
- Consider the swing direction and clearance required for the gates or doors to function correctly without obstruction.
Step 7: Double-Check Your Measurements
Before finalizing your order, it’s crucial to double-check all your measurements to ensure accuracy and prevent costly mistakes.
Tips for Ensuring Accuracy and Avoiding Common Mistakes:
- Re-measure each section and compare the new measurements with your initial ones.
- Verify that all measurements align with the design plans and that no critical details have been overlooked.
Why It’s Crucial to Double-Check Measurements Before Ordering:
- Accurate measurements ensure that the custom railings will fit perfectly, reducing the risk of installation issues.
- Double-checking helps avoid errors that could lead to delays, additional costs, and potential safety hazards.
By carefully following these steps and paying attention to detail, you can ensure that your custom railings will be accurately measured and fit seamlessly into your space, providing both safety and aesthetic appeal.
Professional Help for Your Custom Railing Needs
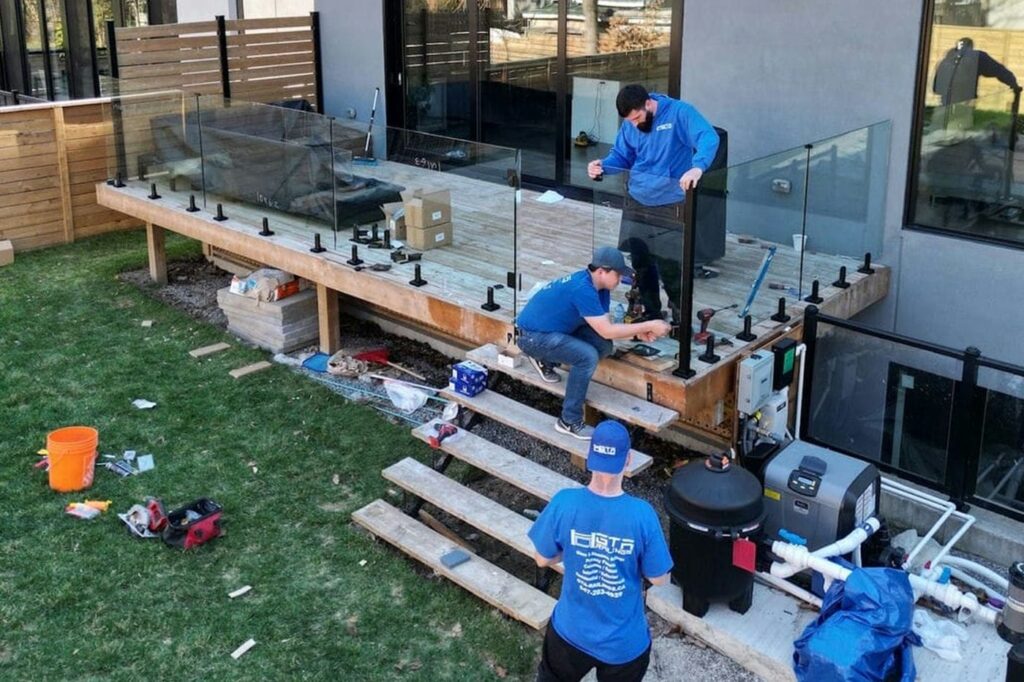
Measuring for custom railings can be challenging, and getting it right is crucial for a perfect fit and safe installation. If you’re not the DIY type, don’t worry! GTA Railings is here to help.
At GTA Railings, we specialize in providing professional railing installation services. Our experienced team ensures that every detail is accurately measured and expertly installed, delivering stunning custom railings tailored to your space.
Contact GTA Railings today to schedule a consultation. Let us take care of the measurements and installation, so you can enjoy beautifully crafted railings without the hassle.