
Low-profile hardware is what makes indoor glass railings look clean instead of clunky. The right system can hide most of the metal, keep the glass feeling solid, and make your stairs and landings easier to live with day to day. This guide shows the main hardware families, the real tradeoffs behind “minimal,” and how to choose without guessing.
Most homeowners start with the same request: “I want it to look almost invisible.” That’s a fair goal. However, the most minimal installs are also the most sensitive to structure, layout, and details like base transitions and handrail lines. We’ll keep it practical and house-focused.
What “Low-Profile Hardware” Means (And What It Doesn’t)
Definition You Can Use In One Sentence
Low-profile hardware is the mounting and finishing system that keeps glass secure while minimizing visible metal like posts, bulky clamps, and thick top rails. In plain terms, it’s the difference between “glass with a lot of parts” and “glass that looks built-in.”
Here’s the catch: low-profile does not mean low-structure. You still need proper anchoring, correct glass sizing, and a handrail strategy that makes sense on stairs. Minimal is a design choice, not a shortcut.
Why Low-Profile Hardware Matters On Stairs And Landings
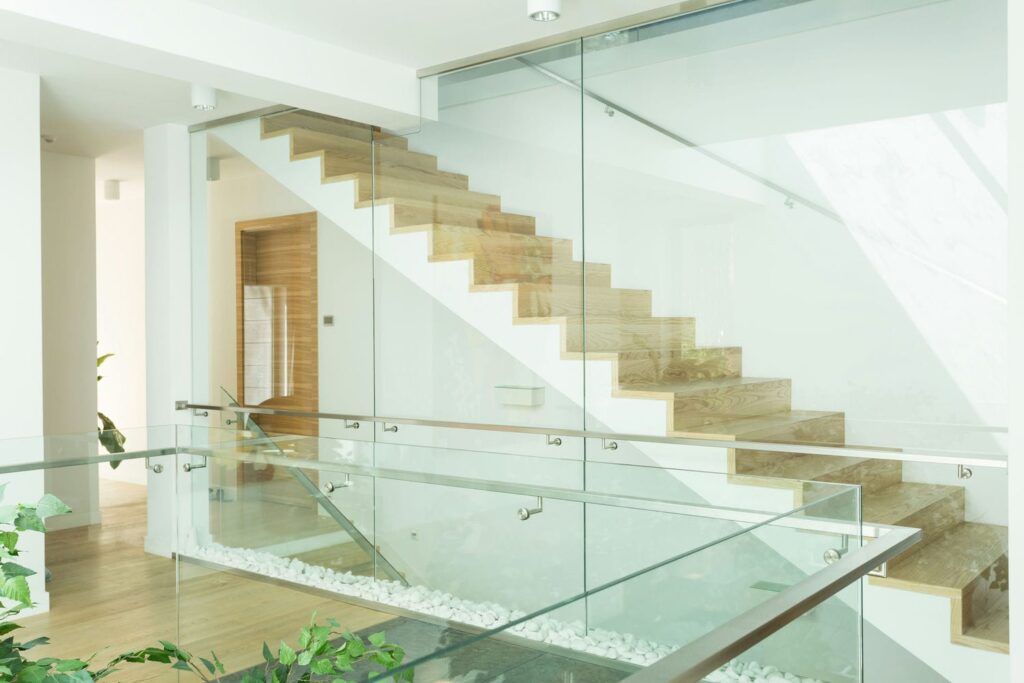
On stairs, your eye follows the rail line. If the hardware is chunky, it can make the whole stair feel busy. Low-profile choices help the railing fade into the background so the architecture and finishes do the talking.
On landings, you notice different things. The base detail, corners, and transitions into walls are what “date” a railing fast. Clean base hardware keeps landings crisp and makes cleaning easier because you have fewer ledges and pockets where dust collects.
The Main Hardware Families (And Where Each Looks Best)
Shoe Channel (Base Shoe) Systems
A shoe channel is a continuous base that captures the glass along the floor line. From standing height, it often reads like “glass coming straight out of the floor,” which is why it’s a favourite for modern interiors and open-to-below edges.
The tradeoff is that the floor matters a lot. A shoe channel needs solid anchoring and a clean base condition. If your flooring is uneven, transitions are sloppy, or the substrate is weak, you’ll feel it in the finished result. The win is worth it when the structure and layout support it.
Standoff (Pin) Mounts
Standoffs create a floating look by holding the glass off the side of the stair or landing with small round mounts. This is one of the most “architectural” looks you can get, especially on feature stairs.
The tradeoff is visibility by design. Standoffs are smaller than posts, but you still see them. They also demand precision: layout, drilling, and alignment need to be right so the system feels solid and the glass lines stay straight.
Clamp Systems
Clamps are a familiar approach that grips the glass at points along the run. In the right layout, clamps can look clean and intentional, especially when you keep the count low and align them consistently.
The tradeoff is visual busyness if you overuse them. Too many clamps can make a modern railing feel like a mechanical assembly. Clamps can also create more “touch points,” which affects cleaning and smudge visibility over time.
Mini-Posts With Glass Infill (Low-Visual Post Strategy)
Mini-post systems use slimmer posts as the structure and let the glass do the visual work. This can be a smart option when your structure prefers posts, but you still want the light, open feel of glass.
The tradeoff is that it is not fully invisible. You will see posts. The upside is stability and forgiveness on tricky substrates, especially in renovations where you want strength without rebuilding the stair.
Stairs Vs Landings: Hardware Priorities Change
On Stairs, The Handrail Line Is The Whole Game
Stairs are about guidance as much as guarding. People track the rail line with their hand, not the glass. If the handrail is awkward, too bulky, or broken up, the whole system feels wrong even if the glass looks great.
Low-profile stair hardware works best when it supports a clean, continuous handrail strategy. Sometimes that means a slim top cap. Other times it means a separate wall-mounted handrail paired with glass, which keeps the glass line clean and improves grip where it matters.
On Landings, The Base Detail Is What You Notice
Landings put the base on display. Corners, end caps, floor transitions, and the way the glass meets walls are what your eye catches. A slim shoe with clean returns can look premium. A tall or mismatched shoe can look like an afterthought.
Landings also see more traffic around the edge. If you want a low-profile look that stays low-maintenance, you need to think about how people move near the base. The best “minimal” railing is the one you can live with without constantly babying it.
Top Cap, Capless, Or Separate Handrail: How To Keep It Minimal
When A Top Cap Helps (Even If You Want Minimal)
A top cap can create a single clean line across the stair and landing. It can also protect the top edge of the glass from bumps and unify minor variations in the glass edge line. In many homes, that single line is what makes the railing feel finished.
If you worry that totally clear glass “disappears” too much, a slim cap can improve visibility without making the system feel heavy. You get a clearer boundary at the edge, which can help daily navigation.
When Capless Looks Best (And The Conditions It Needs)
Capless looks the most minimal when everything else is right. It can make the glass feel like a pure plane with no interruptions, especially on landings where sightlines matter most.
The tradeoff is tolerance. Capless demands precise glass finishing, clean alignment, and a mounting method that holds the panel rigid without relying on a heavy top rail to hide movement. If you want capless, plan it early so structure and base details support the look.
The Cleanest Handrail Strategy For Homes
In most homes, the cleanest approach is the one that matches how you actually use the stairs. If you want the glass to stay visually quiet, a separate handrail can keep the “grip line” distinct from the glass plane. If you prefer a single integrated line, a slim cap or integrated rail can work well.
For broader style direction beyond hardware alone, see our guide to design options for indoor glass railings.
Glass Choice Affects Hardware More Than People Expect
Tempered Vs Laminated: What Changes For Hardware
Hardware does not live in isolation. Glass type and thickness affect weight, stiffness, and how the whole system feels when you lean on it. That “feel” is what homeowners notice most, even if they can’t name why.
Tempered and laminated glass each have a place in interior railings, and the best choice depends on your layout, spans, and the hardware family you select. If you want the deeper breakdown on what changes and why it matters at home, see tempered vs laminated glass for interior railings.
Edge Finishing And Clean Lines
Minimal reads expensive when the reveals are consistent. Polished edges, straight lines, tight base transitions, and clean corner details do more for the look than fancy hardware finishes.
If edges are sloppy or transitions are improvised on site, even good hardware looks cheap. That is why we treat hardware choice, glass spec, and layout as one package, not separate decisions.
Simple Comparison Table (Choose Faster)
If you want a fast shortlist, start here. Pick the option that matches your priority, then read the sections below for the “gotchas” that matter in real homes.
| Hardware Option | Best For | The Catch |
| Shoe Channel | Cleanest look on landings and long runs | Needs solid substrate and clean base transitions |
| Standoffs | “Floating” modern look on feature stairs | Visible mounts and precision layout are non-negotiable |
| Clamps | Renovations with constraints and certain layouts | Can look busy if clamp count grows |
| Mini-Posts + Glass | Stability with a lighter overall look | Not fully invisible, but often most forgiving |
How To Choose Low-Profile Hardware In 5 Steps
Step 1: Start With Structure, Not Instagram
Start with what you can anchor into. Wood framing, concrete, steel stringers, and finished flooring all behave differently. If the substrate is weak or inconsistent, the cleanest hardware in the world will still feel wrong.
This is also where renovations get real. Sometimes the smartest “low-profile” choice is the one that fits the structure without forcing workarounds. A clean railing is not only what you see. It is also what you do not have to fix later.
Step 2: Decide Where You Need The Cleanest Sightline
Pick your priority zone. If your landing overlooks the main floor, you may want the base to disappear, which points toward a shoe channel. If your stair is the showpiece, you may accept visible standoffs because the floating look becomes the feature.
This step prevents overbuilding. You do not need the most minimal system everywhere. You need the right minimal system where it matters most in your home.
Step 3: Choose Your “Metal Visibility Budget”
Every railing has metal. The question is how much you want to see. Shoe channels hide metal low. Standoffs show small metal points. Clamps show more repeated metal. Posts show the most structure, but can still look refined if they are slim and spaced well.
Be honest about your tolerance. If “no visible metal” is your top priority, you will need a plan for the base and corners. If you are okay with minimal visible mounts, you can get a beautiful result with simpler constraints.
Step 4: Confirm The Handrail Strategy
On stairs, the handrail is not a styling accessory. It is how people move safely. Decide early whether you want a slim top cap, an integrated rail, or a separate handrail that stays visually distinct from the glass.
If you want to explore graspable handrail options that pair well with glass, our Stair Railings service page shows practical directions and profiles.
Step 5: Finalize Glass + Hardware As One System
This is where “minimal but solid” comes from. Glass thickness, mounting method, handrail choice, and layout all interact. When these parts are matched, the railing feels rigid, looks clean, and stays easy to maintain.
If you choose each part separately, you usually end up compromising on site. That is when shoes get taller than you wanted, clamps multiply, or caps become bulkier “just to make it work.”
Safety And Ontario Code Considerations
Guards Still Need To Meet Height, Openings, And Strength Intent
Low-profile hardware still has to perform like a guard. That means the overall system must meet the intent of Ontario’s guard requirements for height, openings, and loads. Hardware choice cannot be used to “cheat” compliance. It has to support it.
If you want to reference the official regulation text, Ontario posts the Building Code regulation on e‑Laws here.
Kid-Safe Details Without Overbuilding The Topic
Low-profile can also be practical for families. Smooth faces and fewer horizontal “rungs” reduce climb aids. Clean base details can also reduce gaps that attract toys and feet.
If your priority is child safety and day-to-day home behaviour, use our dedicated guide and apply it alongside hardware decisions: childproofing indoor glass railings.
Common Hardware Mistakes That Ruin A “Minimal” Railing
Choosing Hardware Before Confirming Substrate And Layout
The most common mistake is picking hardware based on photos before confirming what your structure can support. That is how you end up with a system that looks minimal but feels springy, or a “capless” plan that quietly turns into a bulky cap at install time.
A quick site assessment prevents this. It also lets you plan corners, returns, and transitions so the base detail stays clean instead of patched.
Over-Complicating The System
Mixing too many hardware types in one run makes the railing look busy. It also creates more parts to align and more places for visual noise to creep in. Minimal works best when the system is consistent from start to finish.
If you want a simple way to keep the look clean, limit yourself to one primary mounting strategy per run. Then choose finishes that match nearby metals in your home.
Ignoring Cleaning And Fingerprints At The Design Stage
Glass shows fingerprints. That is part of the deal. Hardware choice affects how often the glass is touched and how easy it is to wipe. A separate handrail can reduce contact with the glass face. Fewer brackets and ledges also mean less dust collection.
The goal is not “zero marks.” The goal is a layout that stays easy to clean in normal life, without special products or fussy routines.
Get A Clean Look Without Guessing On Hardware
Low-profile hardware looks simple, but the decision is rarely simple. Structure, sightlines, handrails, and glass choice all push the look and the feel in different directions. The smart move is to pick a system that stays clean visually while still feeling solid when you use the stairs every day.
GTA Railings helps you choose the right hardware as a complete system, not a collection of parts. We bring 15+ years of experience, railings made in Canada, and a certified and insured crew, plus a 2-year warranty on materials and workmanship. If you want a low-profile result that holds up, start with our indoor glass railings service and book a consultation.
Frequently Asked Questions
A slim shoe channel is often the most minimal from eye level because it hides structure at the base. Standoffs can also look minimal, but they remain visible by design and require more precision in layout.
Not always. A top cap can protect the glass edge and create a clean continuous line. Capless can look even cleaner when the glass edges, base mounting, and overall rigidity are planned properly.
Start with the handrail strategy, then choose hardware that supports it cleanly. On many stairs, a minimalist cap or a separate handrail paired with a clean base system gives the best balance of looks and daily comfort.
They can be, when engineered correctly and anchored into the right structure. The mount style matters less than the substrate, layout, and glass specification that supports it.
Yes. Thickness, weight, and performance expectations affect which mounting methods make sense for your spans and layout. If you want the deeper comparison, start here: https://gta-railings.ca/tempered-vs-laminated-glass-for-interior-railings-what-matters-at-home/
Choose fewer parts, reduce ledges where dust collects, and plan handrails so people are not constantly touching the glass face. Minimal designs look best when they’re also easy to wipe during normal cleaning.
Often yes. Smooth faces and fewer climb aids help, but safety comes from the full guard design, not one part.