
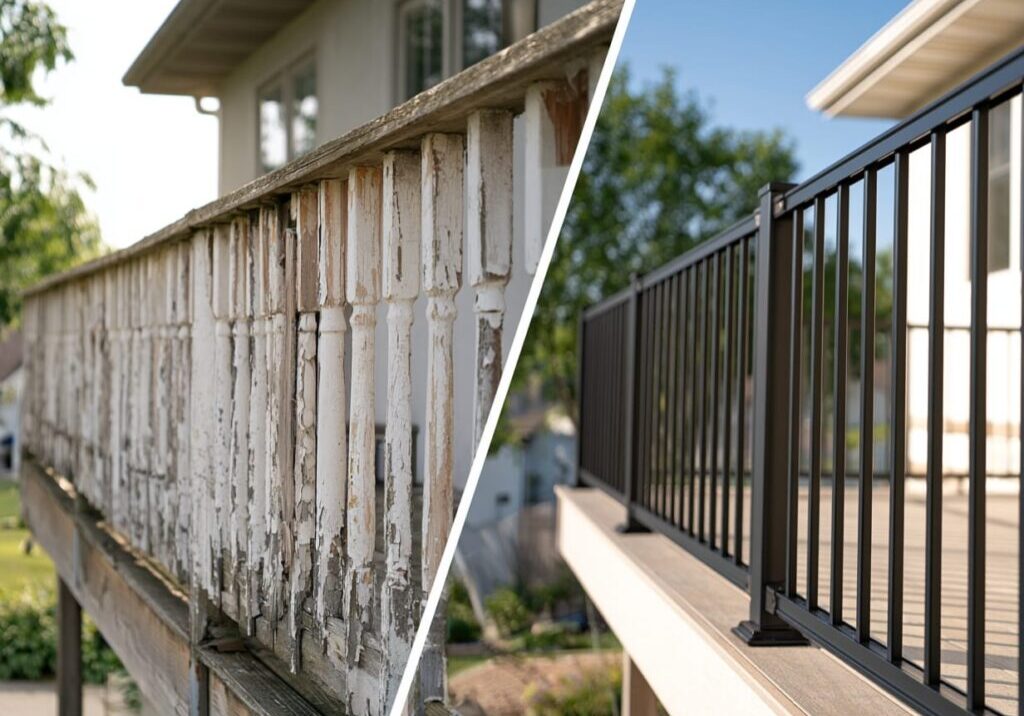
A painted wood porch railing does not weather as one surface. The top rail fails first, and once the top rail looks bad you repaint the whole railing, so the top rail sets the schedule for everything else. No one publishes a repaint interval for porch railings that we can point you to. The published figures are for exterior wood siding and trim: 4 to 5 years from one topcoat, up to 10 from two coats. A top rail is the hardest surface on the railing, so it reaches you well before that, usually around year 3.
At a certain point this stops being a cosmetic decision. Once the film breaks, the wood underneath wets and dries with every rain, and the paint is no longer protecting anything. If you are weighing another scrape-and-recoat against new front porch railings, the rest of this page is the reasoning we use.
Why the Top Rail Sets the Schedule for the Whole Railing
Almost nobody arrives at this idea on their own, and everything else on your railing follows from it. A railing is not one surface with one service life. It is several surfaces with very different ones, joined into one assembly. You repaint on the worst one.
One Railing, Two Very Different Exposures
A vertical picket sheds water in seconds. Rain runs down it and drips off, and the sun strikes it at a glancing angle for part of the day. A horizontal top rail does the opposite. It holds a puddle after every storm, holds snow for days, holds ice through a thaw, and takes the sun close to perpendicular for the longest stretch of the afternoon.
Then add the part no product datasheet covers. People put their hands on the top rail, set drinks on it, and lean their weight into it every time they come up the steps. Same coating, same day, same railing, two completely different service lives.
Why You Repaint Everything When Only One Part Failed
Here is where the cost quietly compounds. Pickets on the same railing can still look acceptable at year 6 while the top rail is visibly failing at year 2 or 3. In theory you have one failed surface and a dozen sound ones. In practice you have a railing that looks bad from the sidewalk.
So nobody repaints a top rail alone. Fresh paint beside a finish that has weathered for years does not match, and once the drop sheets and the scraper are out, the extra effort of doing the pickets is small. The cadence gets set by the assembly’s worst surface, not its average one. Which raises an obvious question about that top rail, and we take it up further down.
What “Around Year 3” Actually Means
There is no published repaint schedule for porch railings to point you to. The published figures cover exterior wood in general exposure: Purdue Extension puts one topcoat over primer at 4 to 5 years, and a two-coat system at up to 10. Those figures describe siding and trim.
Your top rail is not siding. It is flat, it holds snow and rain, it takes the sun for most of the day, and you touch it every time you use the porch. So the number that matters on your railing is set by its hardest surface, not by an average. For most painted wood porch railings in this climate, that lands around year 3. If that is where you have landed, you did not hire the wrong painter.
What Is Actually Happening Under the Paint
Two objects are stacked on each other here. One is a moving, breathing, water-absorbing substrate. The other is a thin rigid skin bonded to its face. Almost everything that goes wrong on a painted wood railing follows from that mismatch.
The Wood Under Your Paint Never Stops Moving
Wood used outdoors eventually settles at 12 to 18 percent moisture content, and according to the Canadian Wood Council it shrinks and swells whenever that number changes. That change is not seasonal. It happens with rain, with dew, with a humid week in August and a dry cold snap in January.
So the film is not sitting on something stable. It is bonded to something that gets slightly bigger and slightly smaller under it, thousands of times, for years. A good coating tolerates that for a while. Nothing tolerates it forever.
Moisture Is the Usual Cause, Not Bad Paint
Moisture is the most common cause of premature paint failure on wood. It arrives from outside as rain and dew, and from behind as water vapour moving out through the wood. Either way it reaches the back of the film, which is the one side the paint cannot protect.
That reframes the question most homeowners ask us. They want to know which brand failed them. Usually no brand did. Water got behind the film through an end grain, a joint or a surface that never fully dried, and pushed the coating off from underneath.
Why a Film Peels and a Penetrating Finish Cannot
Paint and solid-colour stain form a film, a continuous skin sitting on the wood. Semi-transparent stains and water repellents work the other way: they soak in and colour the fibres themselves.
A film can lift. Once water gets behind any part of it, that part loses grip, and the failure spreads outward as an edge you can pick at. A penetrant has nothing to lift, because there is no separate layer. It wears and fades instead. On a flat top rail that holds water, that difference is the whole story.
Where the Peeling Usually Starts

A railing almost never fails uniformly. It fails at the details first, and the details are predictable. If you know where to look, you can read a railing’s remaining life in about 30 seconds.
Joints, End Grain and Picket Bottoms
End grain is the cut end of the wood, where the fibres run into the surface rather than along it. Think of a bundle of straws cut across. End grain drinks water far faster than face grain, which is why picket bottoms, rail ends and post tops are where water enters and where the peel usually starts.
Moisture blisters follow. They are bubble-like swellings in the film, caused by water entering through joints, end-grain areas and poor construction detailing. So blistering low on a picket where it meets the bottom rail is not a paint defect. It is where the water is getting in.
A 30-Second Inspection You Can Do This Weekend
You do not need tools for this, only a walk down the porch and some pressure from your thumb. Work through it in order.
- Press the top rail firmly near the middle of each span and feel for softness or sponginess under the paint.
- Run your hand along the underside of the bottom rail, the surface no one looks at and the one that fails first out of sight.
- Look at the picket bottoms where they meet the bottom rail, checking for blistering, dark staining or gaps.
- Check the post bases where they meet the deck, and push sideways on each post to feel for movement.
- Look at the cracking pattern: cracks running across the grain matter far more than cracks running along it.
If everything is firm and the only cracking runs with the grain, you are looking at a normal recoat. If step 1 or step 5 gives you a bad answer, the job has changed.
Why Repainting Gets Harder Over Time
Repaint 5 is not the same job as repaint 1. The railing has not grown, but the work has. This is the part of the cycle people underestimate, and it is why a recoat eventually stops being an option at all.
Paint Builds Up, and Thick Paint Cracks Across the Grain
Every repaint that goes over an existing coat adds thickness. That is fine for a while. But cross-grain cracking happens when coatings get too thick, typically on surfaces painted many times, and it is a different animal from the fine crazing on an older finish. It runs perpendicular to the grain and eventually breaks through the full depth of the stack, down to bare wood.
Once a surface reaches that state, another coat does not fix it. Adhesion in a multi-coat film is a chain, and when the stack has cracked through, there is no sound layer left to bond to. The paint has to come off, and that is a different job from the one you were planning.
Rushed Prep Is Why the Next Coat Fails Early
The other way a repaint disappoints is intercoat peeling, the new paint separating cleanly from the old coat underneath rather than from the wood. It is caused by inadequate cleaning of the surface before recoating. Chalk, pollen, road film and mildew all sit between the layers and stop them bonding.
So adhesion, not paint quality, sets service life. A homeowner who scrapes the obvious flakes on a Saturday morning and rolls a coat on that afternoon has bought maybe two seasons. The paint did not fail. The bond never formed.
What a Full Strip Actually Involves
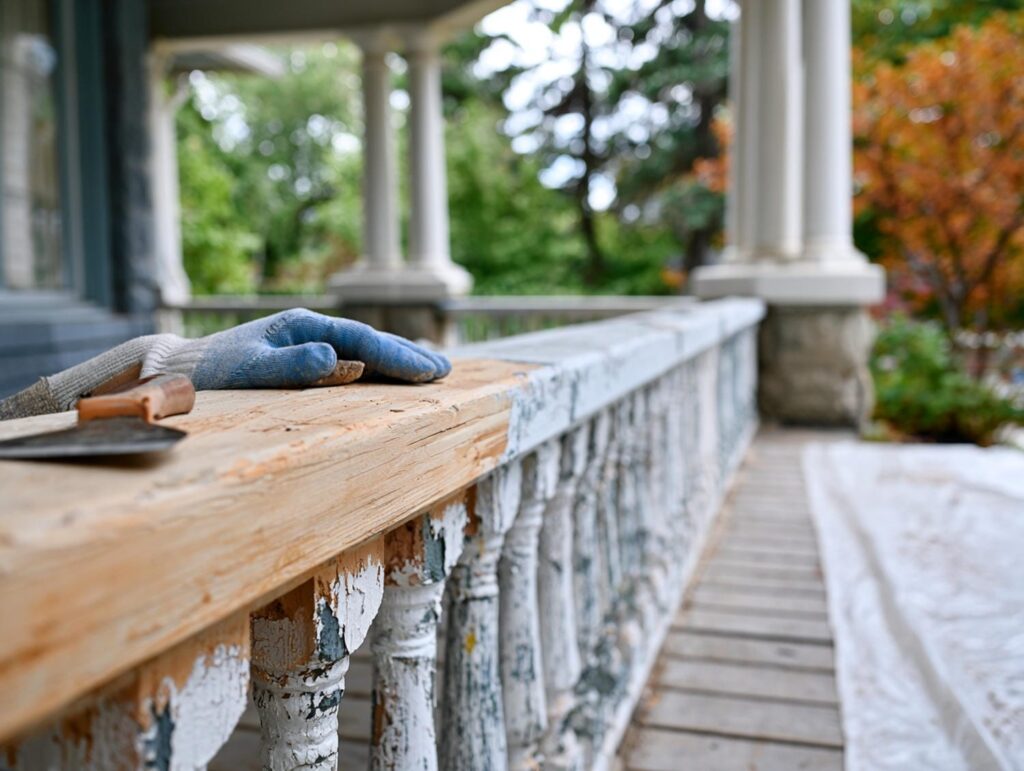
The last section said the paint eventually has to come off. Most people picture that as a longer, more annoying repaint. It is not. It is a different job with different tools, and on an older railing there is one question worth settling before you touch it.
A Strip Is a Different Job, Not a Bigger Repaint
Start with what a normal recoat is, because the contrast is the point. The published sequence runs: scrape away all the loose paint, sand what remains so its edges feather smooth into the bare wood, wash the old paint down and rinse it, treat any exposed wood with a water-repellent preservative, let it dry, then prime. Every step assumes there is sound paint left to feather into.
Cross-grain cracking removes that assumption. A strip takes every coat off, back to raw wood, one section at a time. It has to reach every inside corner where a picket meets a rail, the profiled edges of the top rail, the end grain at each picket bottom, and the underside of the bottom rail where no sander reaches and where the failure is usually worst. Plan it as a project, not an afternoon.
The Age Question to Settle Before You Start Sanding
Start with the reassuring part, because this is not a reason to panic. The City of Toronto is clear that paint in good condition does not have to be removed at all: it can be painted over or covered. The problem is not that old coats exist on your railing. It is that a failing film has stopped being intact, and taking it off is what puts whatever is in it into the air.
The dates are the part worth knowing. Health Canada puts lead-based paint as probable in a home built before 1960, and possible on exterior surfaces in a home built between 1960 and 1990. Homes built after 1990 should not have it. A porch railing is an exterior surface, so the 1990 boundary is the one that matters here.
Now the part that matters most. The two easiest tools for stripping a railing are the orbital sander and the heat gun. Those are exactly the two the safety guidance rules out if the paint might be old, along with scraping or vacuuming failing paint dry. What is recommended instead is a chemical stripper paste, brushed on and softened rather than abraded off.
Age tells you whether to ask the question. It does not answer it. If your home dates from before 1990 and the railing has been painted more times than anyone remembers, get the paint tested before you start taking it off.
Prime Bare Wood Within About 48 Hours
Here is the detail that decides how a strip has to be scheduled. Once wood is taken back to bare, it should be primed within about 48 hours, before it starts taking on moisture again. Bare wood left through a rainy weekend is not the same substrate you exposed on Friday.
We work to that on our own jobs, and it shapes the sequence more than anything else does. We do not strip more of a railing in a day than we can prime that day. That is why a strip does not scale down into a Saturday, and why it needs a dry stretch of weather booked around it.
Pressure-Treated or Cedar: What Changes and What Does Not
The species question comes up in nearly every conversation we have about a wood railing. It matters less than people hope it will, and it matters in a way most people do not expect.
Both Move, So Paint Has to Move With Both
Cedar and pressure-treated lumber both respond to the weather. Both take on moisture when it rains and give it back when it dries, and both change dimension slightly every time they do. The film on top has to follow that movement whichever species is underneath it.
So neither is exempt from the mechanism above. Cedar is more stable and more naturally durable, and it takes a finish nicely. It still moves. Choosing cedar buys you a better substrate, not different physics, and the top rail is still the surface that reaches you first.
Pressure-Treated Wood Arrives Wet, and That Is the Trap
Treatment forces liquid deep into the wood, so pressure-treated lumber often arrives on site heavy and damp. Here is the catch: wood does most of its shrinking as it dries from about 28 percent moisture content down to 19 percent, and “dry lumber” is defined as 19 percent or less. Paint applied before the wood gets there cures on a substrate that is about to change size underneath it.
That one scheduling mistake explains a large share of the bad paint jobs we get called out to look at. Checks also develop as treated lumber dries, and checking on a pressure-treated railing is not something you can paint away. If your railing was built and finished in the same week, that is worth knowing before you blame the coating.
What Ontario Winters Add
The mechanism above runs everywhere that wood meets weather. Southern Ontario just runs it harder, and runs it more often. Two winter stressors do most of the damage on a porch.
Freezing, Thawing, Freezing Again
Southern Ontario crosses the freezing point dozens of times each winter, not once. Every crossing pushes water into a hairline crack in the film and then expands it as that water turns to ice. The crack gets a little wider each time, which lets in a little more water for the next cycle.
That is what turns a small chip in November into a peeling top rail by April. It is also why the damage seems to appear suddenly in spring. The work was happening all along under the snow, in a place too small to see.
Salt Comes Up the Steps With You
Salt is on every sidewalk, driveway and municipal walkway in an Ontario winter, and it does not stay there. It comes up onto the porch on boots, on dog paws and on the shovel, and it settles on the horizontal surfaces first. Those are the same surfaces that hold meltwater, so the top rail and the bottom rail see it most.
You already know this from your own front steps. The white crust on the porch floor in February is the same crust ending up on the rails you touch. It is one stressor among several, and it lands on the surface already doing the hardest work.
Can You Make a Painted Wood Porch Railing Last Longer?
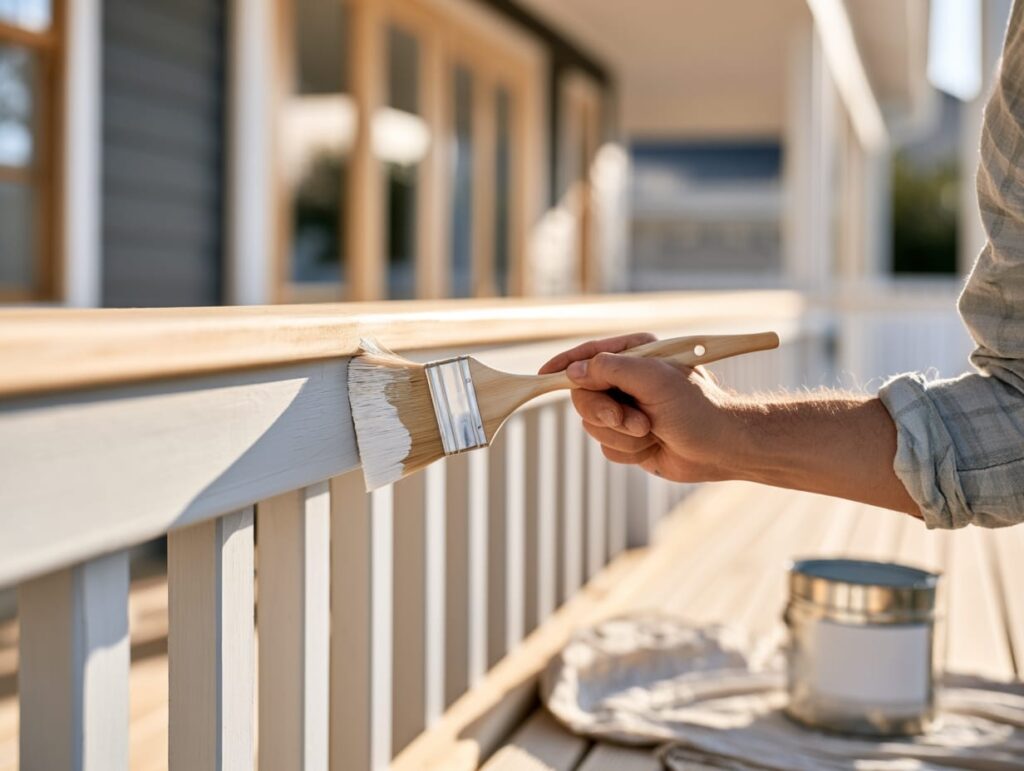
Yes, meaningfully, and within limits. Good practice moves the interval by a year or two and makes each round of work smaller. It does not change what a film does on a horizontal surface that wets and dries.
What Actually Extends the Interval
Almost all of the available gain is bought before the finish ever goes on. Let pressure-treated wood dry down before you finish it. Prime all six sides of every member, including the cut ends, before assembly rather than after. Seal end grain deliberately, since that is where water enters. Use two coats rather than one, because the published interval for two coats is roughly double the interval for one.
Then recoat before the film breaks rather than after. That habit is what separates a 6-year railing from a 3-year one: recoating a sound, faded finish is washing and painting, while recoating a broken one means scraping, sanding and spot-priming first. Broader upkeep beyond the repaint interval is covered in how to maintain a railing properly.
Would Better Paint Fix It?
This is the second question we get, and the honest answer is a qualified no. Product quality shifts the interval by a year or two. A premium exterior acrylic holds colour better, stays flexible longer and resists mildew better than a builder-grade coating, and that is worth paying for.
But it does not change what happens when a film sits on a horizontal, wet-and-dry substrate that people touch daily. Preparation and adhesion beat price. Effort spent on drying time, cleaning and priming buys more service life than moving up a product tier does.
Is Stain a Rescue?
Partly, and not in the way people expect. A single coat of semi-transparent penetrating stain on new wood is expected to last 2 to 4 years, and water-repellent preservatives only 1 to 2 years, with later coats lasting longer than the first. So stain is not less frequent than paint.
Here is the catch, and it works in stain’s favour. Stain fails gracefully. It fades and thins rather than peeling, because there is no film to lift. Each round of work becomes washing and recoating instead of scraping, sanding and feathering. You go up the ladder more often and do far less when you get there.
What Lasts Longer, and What You Give Up
This is the comparison most readers came for, and it deserves a fair hearing on both sides. The useful question is not which material is best. It is which maintenance task you want to own for the next 15 years.
| Railing type | Refinishing needed | What sets the interval |
| Painted wood, top rail | The first surface on the railing to fail, and the one that triggers repainting the whole assembly | A film-forming coat on a flat, wetted, sun-facing, hand-touched surface |
| Painted wood, vertical pickets | 4 to 5 years from one topcoat, up to about 10 years from a two-coat system (published figures for exterior wood siding and trim, Purdue Extension) | Coating system and preparation quality |
| Semi-transparent stain on wood | 2 to 4 years for the first coat, longer on recoats (Purdue Extension) | Penetrates rather than films, so it fades instead of peeling |
| Powder-coated aluminum | No repainting in normal service, cleaning only | Coating specification, tested under AAMA 2604 and 2605 outdoor exposure |
| Glass with aluminum posts | No repainting, glass cleaning | Same aluminum coating, and glass is inert |
Powder-Coated Aluminum
The honest way to describe a powder-coated aluminum railings is by the standard it is tested to, not by a lifespan number. For example, AAMA 2604 coatings are tested through 5 years of outdoor exposure in South Florida, and AAMA 2605 through 10 years, in a climate chosen because its sun is harsher than ours. Those are test-exposure durations rather than warranties, which is why they are a fair basis for comparison.
What that buys you in Ontario is a railing you clean rather than one you refinish. The maintenance task changes category: a bucket and a season-opening wash instead of a scraper, a sander and a dry weekend. Finish choice still matters within aluminum, so it is worth understanding the difference between anodized and powder-coated finishes before you specify one, and the corrosion reasons why aluminum holds up outdoors are covered separately.
Glass With Aluminum Posts
Glass panels with aluminum posts put the same coating on the same structural members, and the infill itself is inert. Glass does not absorb water, does not move with humidity, and holds no finish that can fail. So the maintenance task is cleaning, and the frequency is set by how much you mind fingerprints.
The other gain is what you can see. On a porch with a view, or in front of a shaded room, swapping solid pickets for glass keeps sightlines and daylight that a wood railing blocks. That tradeoff plays out differently indoors than it does outdoors, and it is worth weighing on its own terms.
The Honest Case for Staying With Wood
Wood has a real case and we are not going to pretend otherwise. It is warmer-looking than metal, it is cheaper up front, and it is repairable piece by piece with ordinary tools. If a picket splits, you replace a picket. That is a genuine advantage no welded or extruded system offers.
There are also people for whom the cycle is not a burden. Someone who enjoys the ritual of a spring refinish is not making a mistake. Neither is someone who owns a heritage-styled home where painted wood is the correct look, and where an aluminum railing would read as wrong from the street. The argument here is narrower than “wood is bad”. It is about total cost and total attention across 15 to 20 years, and about seeing that the cycle compounds rather than repeats.
When Your Porch Railing Is a Guard, Not Just Trim
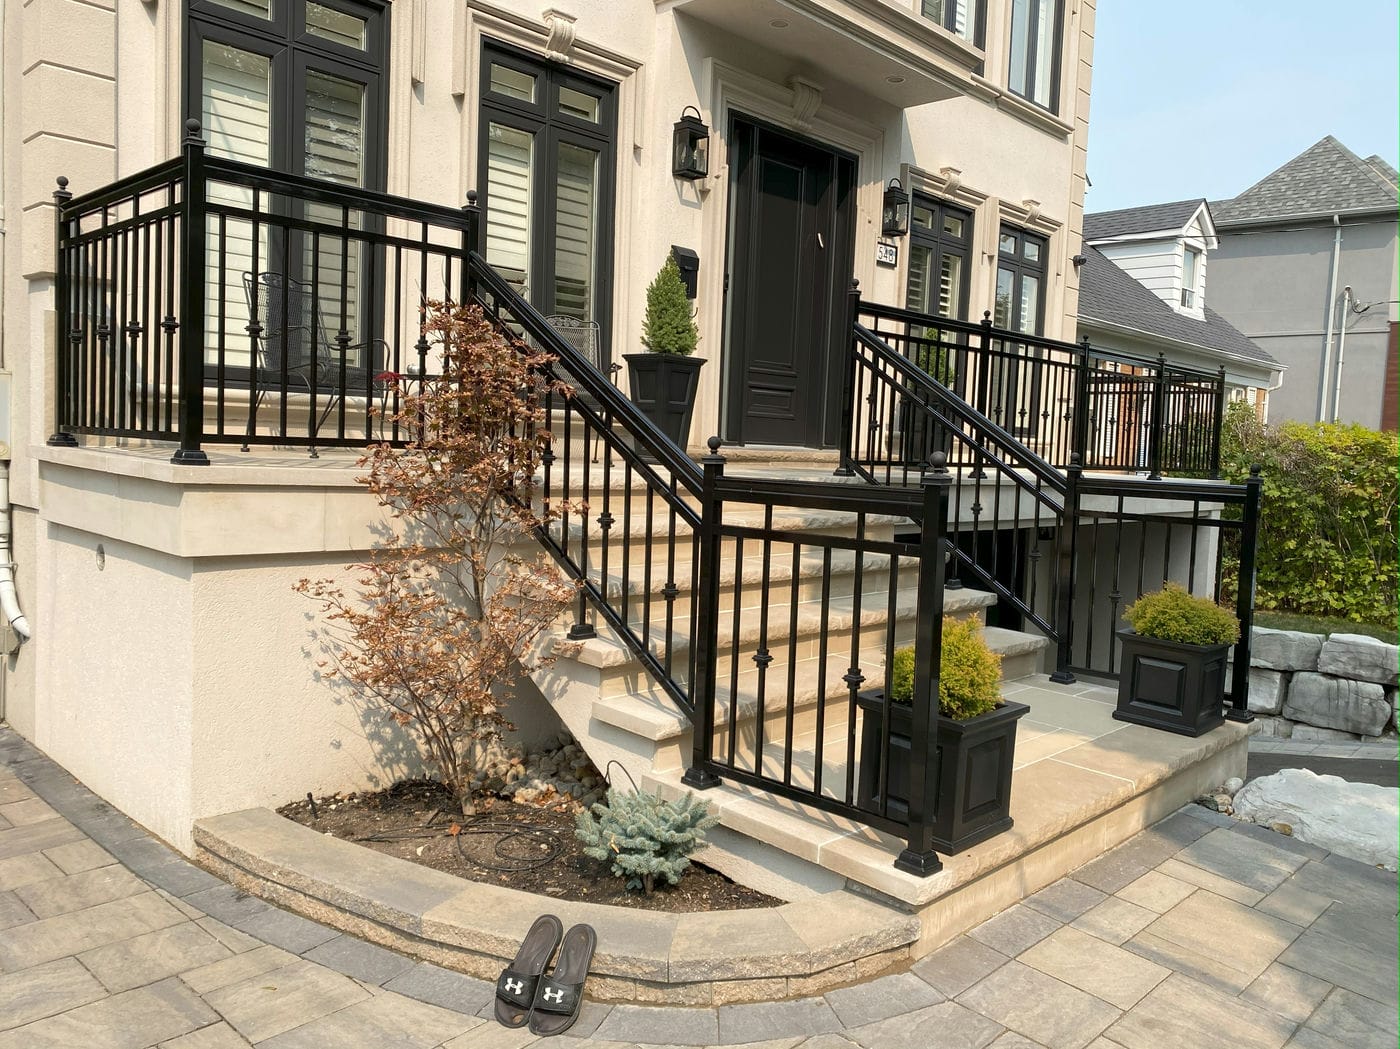
Some porch railings are decoration and some are a required guard, and the height of the walking surface decides which one you have. A guard is required where the walking surface sits more than 600 mm above grade. A great many GTA front porches sit below that line, and on those the railing genuinely is trim. Above it, the decision changes from a decorating question into a safety one.
When a Guard Is Required and How High It Has to Be
The City of Peterborough’s residential deck guidance sets out the thresholds plainly for Ontario homeowners. A guard is required where the walking surface is more than 600 mm (23 5/8 inches) above grade. Minimum guard height is 900 mm (35 7/16 inches), rising to 1070 mm (42 inches) where the surface is more than 1800 mm (5 feet 11 inches) above grade. Guards on flights of stairs are a minimum of 900 mm.
Measure your own porch before you assume which side of 600 mm you are on, because a couple of steps up from a walkway gets there faster than people expect. Requirements vary between municipalities in the region, so confirm with your own building department before you plan work.
Why a Rotted Bottom Rail Is a Safety Item on a Required Guard
Ontario also addresses the openings in a guard and how climbable it is, and guards built in accordance with MMAH Supplementary Standard SB-7, Guards for Housing and Small Buildings, are deemed to satisfy the requirement. SB-7 designs are built around a guard height of 1070 mm and a maximum clear spacing of 100 mm between members. Treat those as how the standard’s designs are put together rather than as figures to measure your existing railing against.
The practical point follows. Where your railing is a required guard, a soft bottom rail or a loose post is a safety item and not a cosmetic one, because the assembly is what keeps a person from going over the edge. It also means a piecemeal repair may not leave you with a compliant guard. Sistering a rotted rail and painting over it can look finished and still not do the job the railing is there to do.
If You Are Done Repainting, Here Is the Next Step
If you have worked out that you are on a cycle rather than facing a one-off job, the useful next step is not a quote. It is a measurement and an honest look at what the porch needs. Where a porch railing is a required guard, it is worth having someone check post anchoring and height rather than matching what is already there, because an existing railing is not evidence that the existing railing was right.
GTA Railings has been building railings across the region for over 15 years, our railings are made in Canada, and we build to Ontario Building Code requirements with a 2 year warranty on materials and workmanship. If you want to know what a replacement would involve on your porch, our work on porch railing installation is the place to start, and you can book a consultation to have someone look at the railing you have.
Frequently Asked Questions
Answer it through the top rail, because that is the surface that decides. Published intervals for exterior paint on wood are 4 to 5 years from a single topcoat and up to 10 years from two coats, but those figures describe siding and trim. A top rail is flat, sun-facing and touched daily, so it reaches you sooner, usually around year 3. You then repaint the whole railing on its schedule.
Orientation. A vertical picket sheds rain in seconds and takes the sun at a glancing angle. A flat top rail holds a puddle, holds snow, holds ice and takes the sun close to perpendicular for most of the day, and people put their hands on it every time they use the steps. Same coating, same railing, completely different workload.
A year or two, maybe. A premium exterior acrylic stays flexible longer and holds colour better, and that is worth paying for. But it does not change what a film does on a horizontal surface that wets and dries under it. Preparation and adhesion set service life more than price does, so effort spent on drying, cleaning and priming works harder than moving up a product tier.
Not if you want to refinish less often. A single coat of semi-transparent stain on new wood is expected to last 2 to 4 years, which is not longer than paint. What you gain is how it fails. Stain fades rather than peeling, because there is nothing sitting on the surface to lift, so each round of work is washing and recoating instead of scraping and feathering.
No. Treatment forces liquid into the wood, and it arrives wet. Most of the shrinking happens as it dries from about 28 percent moisture content down to 19 percent, which is where “dry lumber” starts. Paint applied before then cures on a substrate that is about to change size underneath it, and the coat fails early no matter how good the paint was.
Yes, and it is worth settling before you start. Health Canada puts lead-based paint as probable in homes built before 1960 and possible on exterior surfaces in homes built between 1960 and 1990. A porch railing is an exterior surface, so the 1990 date is the one that applies to you. Age tells you to ask the question rather than answering it, so get the paint tested before you take any of it off.
It matters. Once the film breaks, the wood underneath wets and dries with every rain instead of staying protected, and decay risk climbs from there. Peeling paint is the visible start of a substrate problem, not the end of a cosmetic one. Where the railing is a required guard, a soft bottom rail or a loose post is also a safety item and should be looked at rather than painted over.
In normal service, no. The routine task is cleaning. The fair way to describe the finish is by the exposure testing behind it: AAMA 2604 coatings are tested through 5 years of outdoor exposure in South Florida and AAMA 2605 through 10 years, in a climate with harsher sun than ours. That is a test standard rather than a service-life promise, but it is why the maintenance task is a wash.